Introduction to Starbucks Cake Pop Recipe
Are you a busy young professional looking for the perfect treat to accompany your coffee break? If so, here’s where the coveted Starbucks Cake Pop Recipe comes into play. These delightful little bites of sugary goodness have enchanted many, serving as the ideal sweet fix when you’re on the go. But what makes them truly special? Let’s dive into that!
Why Cake Pops are the Perfect Treat for Young Professionals
Life can be hectic; between meetings, deadlines, and everything else that comes with your daily grind, finding a moment to relax is essential. Cake pops are not only delicious but also:
-
Portable: These bite-sized treats fit effortlessly into your purse or laptop bag. Whether you’re heading to the office or squeezing in a break at a local café, you can bring them along easily.
-
Customizable: One of the best things about making cake pops at home is that you can tailor them to your preferences. From flavors to coatings, creating your perfect treat is part of the fun! Check out Taste of Home for inspiration on flavor variations.
-
Socially Acceptable Indulgence: Sharing treats can create a sense of camaraderie in the workplace, making it a great way to bond with colleagues. Fancy a little food diplomacy? A box of homemade cake pops could do the trick!
-
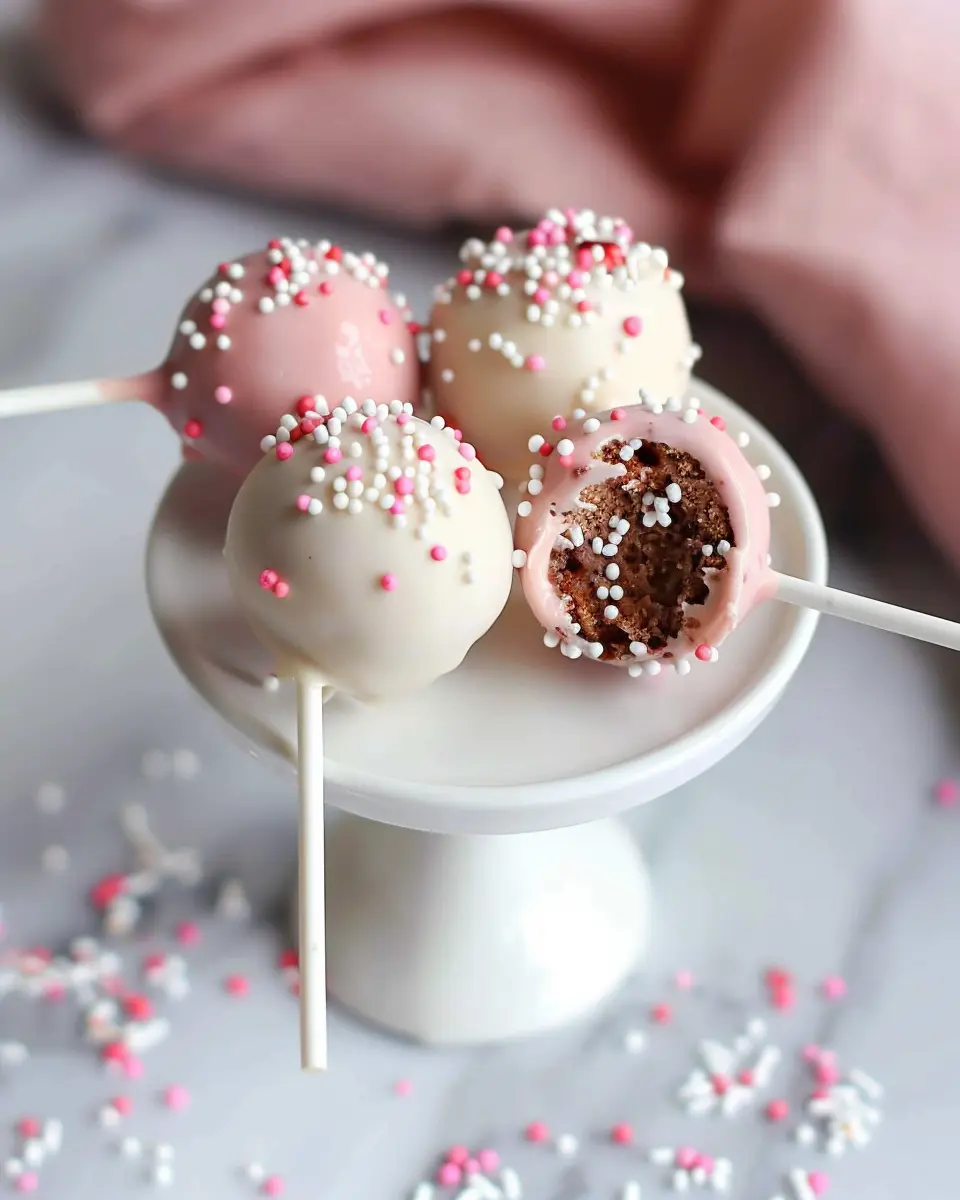
Visual Appeal: Let’s face it — they’re adorable! These colorful little pops are a feast for the eyes, making them perfect for Instagramming or sharing on social media platforms. Who doesn’t love a charming food post?
Baking your own cake pops lets you partake in the joy of creating something delicious while also enjoying the satisfaction of a job well done. Plus, you’ll have the benefit of knowing exactly what ingredients went into your treat. If you’re vegan or gluten-free, you can easily modify the recipe to suit your dietary needs.
Ready to embark on this culinary adventure? A Starbucks Cake Pop Recipe isn’t just a delightful activity but also a chance to create memorable moments. Now, let’s get to the fun part: making these heavenly bites!

Ingredients for Starbucks Cake Pops
Essential ingredients for your cake pop recipe
To recreate that delightful treat from your favorite coffee shop, you’ll need a few essential ingredients for your Starbucks cake pop recipe. Here’s what you’ll gather:
- Cake: Choose your favorite flavor, like chocolate or vanilla. You can even use store-bought cake to save time.
- Frosting: A rich, creamy frosting complements the cake perfectly. Vanilla or chocolate work well!
- Candy Melts: These will coat your pops and add that signature sweetness. You can find a variety of colors.
- Lollipop Sticks: Usually available at craft stores or online, these provide structure to your cake pops.
Optional ingredients for fun variations
Feeling adventurous? You can customize your cake pops with these optional ingredients:
- Flavor Extracts: Add a splash of vanilla, almond, or peppermint for an extra flavor kick.
- Sprinkles: They’re a fun way to dress up your cake pops for parties or special occasions.
- Chocolate Drizzle: A topping of melted chocolate can take your cake pops to the next level.
These simple ingredients are all you need to create a delightful treat that rivals those from Starbucks. So gather your supplies and get ready to impress your friends! For more tips on baking and decorating, check out sources like Baker’s Journal for additional inspiration!
Step-by-step Preparation of Starbucks Cake Pops
Are you ready to dive into the delightful world of cake pops? With our Starbucks cake pop recipe, you’ll be able to recreate this iconic café treat right in your kitchen. They’re perfect for parties, gifts, or just a sweet bite on a rainy afternoon. Let’s break it down into simple steps to ensure your cake pops turn out as delicious as they look!
Gather Your Ingredients
Before we begin, make sure you have everything on hand:
- One box of cake mix (any flavor you love)
- 1 cup of frosting (store-bought or homemade)
- Candy melts (white, milk, or dark, based on your preference)
- Lollipop sticks
- Sprinkles or cake pop decorations (optional)
Now, let’s get to the fun part!
Prepare the Cake Mix
First off, let’s whip up that cake mix. Follow the instructions on the box for a standard cake. Whether you’re baking a chocolate, vanilla, or even a fruity flavor, the choice is yours!
- Preheat your oven according to the package instructions.
- Mix the ingredients in a bowl (typically water, oil, and eggs) until smooth.
- Pour the batter into a greased baking pan and bake as per the time indicated.
Once baked, allow the cake to cool completely. Cooling is crucial because warm cake can make your cake pops a gooey mess!
Crumble the Cooled Cake
Here comes one of the most satisfying parts! Once your cake is fully cooled, it’s time to crumble it into fine pieces.
- Simply take your cooled cake and break it apart in a large mixing bowl using your hands.
- Aim for tiny crumbs, much like a sand texture; this will help us form the perfect cake balls later.
If you’re inclined to learn more about different techniques for crumbling cake, check out resources from baking experts like Wilton.
Mix in the Frosting
This step is where magic happens. Add your frosting to the crumbled cake mixture.
- Start with about ½ cup of frosting; mix it in using your hands or a spatula until well combined.
- The consistency should be moist but not overly sticky. If the mixture is too dry, gradually add more frosting until it holds together.
This frosting acts as the glue, binding your cake crumbs into delicious balls. You’ll find that the moisture from the frosting makes all the difference, delivering that irresistible flavor you’d find in a Starbucks cake pop.
Shape the Cake Balls
Now that your mixture is ready, it’s time to roll some cake pops!
- Take about a tablespoon of the mixture and roll it into a round ball.
- Continue until you’ve used up all the mixture, placing the balls onto a baking sheet lined with parchment paper.
Aim for a uniform size, as this not only looks better but also helps ensure even melting during dipping.
Prepare and Dip in Candy Melts
Next, let’s get colorful!
- Melt your chosen candy melts according to the package instructions — usually in a microwave-safe bowl, stirring every 30 seconds until smooth.
To dip your cake balls:
- Dip the tip of each lollipop stick into the melted chocolate (this helps the stick stay in place).
- Then, insert the stick halfway through the cake ball and dip the entire pop into the chocolate, spinning to coat thoroughly.
Make sure to drip off any excess chocolate for a smooth finish.
Decorate and Let Them Set
Finally, it’s time for the fun part — decorating!
- Sprinkle your pops with decorations while the chocolate is still wet.
- You can also use a drizzle of a contrasting color of candy melts for a polished look.
Place the pops upright in a styrofoam block or stand to let them set completely. A good 30–60 minutes in the fridge should do the trick.
There you have it! A step-by-step guide to crafting your very own Starbucks cake pops. Not only do they make for a delightful treat, but they’re also a great conversation starter for your next gathering. Happy baking!
For more insights on baking techniques, feel free to explore Baking World for tips and tricks!

Variations on Starbucks Cake Pops
Fun flavors beyond vanilla
While the classic vanilla cake pop is undeniably delightful, why stop there? With your Starbucks cake pop recipe, you can explore a world of new flavors. Here are a few fun ideas to get your creative juices flowing:
- Chocolate Mint: Perfect for those who crave a refreshing twist, mix crushed peppermint candies into your chocolate batter, and coat them in chocolate ganache before sprinkling with more crushed mint.
- Red Velvet: For a rich and festive option, substitute red velvet cake mix. Drizzle with cream cheese frosting for that signature taste.
- Lemon Zest: Brighten your day with a fresh lemon cake pop. Incorporate lemon zest into the batter and dip in white chocolate.
These alternatives not only add zest but also allow you to tailor flavors to suit your preferences or those of your friends and family.
Unique decorating ideas for special occasions
What’s a cake pop without some flair? Elevate your Starbucks cake pop recipe for birthdays, weddings, or holiday gatherings with imaginative decorations:
- Themed Sprinkles: Choose colors that match the theme of your event. For a baby shower, consider pastel-colored sprinkles; for Halloween, opt for orange and black.
- Custom Edible Images: Order custom images or logos to adhere to your cake pops, making them perfect for corporate events or personal milestones.
- Chocolate Drizzles: Use contrasting chocolate colors to create beautiful swirls or designs on top.
These decorating ideas not only make your cake pops visually appealing but also add a personal touch that makes every treat special. So, why not dive into the creative side of cake pops and impress your friends and family? For more inspiration, check out resources like Food Network for unique decorating techniques!
Baking Tips and Notes for Starbucks Cake Pops
Achieving the perfect cake texture
To nail the Starbucks cake pop recipe, you’ll want your cake to have an ideal moist yet firm texture. Start by using fresh ingredients, like eggs and butter, and avoid overmixing the batter to prevent dense, gummy pops. A great tip is to let your baked cake cool completely before crumbling—it helps in evenly coating the pops later. You can also consider using cake flour for an even lighter cake base.
Troubleshooting common issues
Even the best bakers face challenges! Here are some common issues and their fixes:
- Dry Cake Pops: If your pops are too dry, consider adding a bit more frosting or a simple syrup.
- Cracking Coating: Ensure your chocolate coating is melted to a smooth consistency. If it’s too thick, it may crack when set.
- Falling Off Sticks: Make sure to anchor the stick with melted chocolate first before dipping the cake pop, ensuring a better hold.
For a visual guide, check out this cake pop tutorial. Happy baking!

Serving Suggestions for Starbucks Cake Pops
Creative ways to present your cake pops
When you whip up this Starbucks cake pop recipe, presentation is just as important as taste! Here are some fun ideas to display your cake pops:
- Cupcake Stand: Use a multi-tiered cupcake stand to showcase your cake pops at parties. It creates a delightful centerpiece.
- Candy Buffets: Incorporate your cake pops into a candy buffet. Pair them with colorful candies and jars for a playful touch.
- Gift Packaging: Wrap individual cake pops in clear plastic bags tied with pretty ribbons. They make great gifts for friends or coworkers.
Best occasions for cake pops
These delectable treats are perfect for a variety of events:
- Birthdays: Brighten up any birthday celebration with festive flavors and colors.
- Office Treats: Bring a batch to the office to boost morale—who doesn’t love a sweet snack during the workday?
- Bridal Showers: Shape them into wedding-themed designs for a delightful nod to the occasion.
With these serving suggestions, your Starbucks cake pops will surely steal the show! For more tips on presentation and event planning, check out resources like the American Baker’s Association.
Time Breakdown for Starbucks Cake Pops
When diving into this Starbucks cake pop recipe, a quick look at the timing can help you plan your baking adventure more efficiently.
Preparation Time
Getting everything ready for your cake pops typically takes around 20 minutes. This includes gathering ingredients, mixing the batter, and crumbling the cake for that perfect pop. Enjoy this process; it’s where the magic begins!
Baking Time
Baking your cake will take about 25-30 minutes, depending on your oven. While you wait, consider sipping on your favorite coffee to stay in the groove of a delightful coffee-shop vibe.
Total Time
In total, you’re looking at around 1 hour from start to finish, including both preparation and baking. With a bit of patience, you’ll be treating yourself and impressing your friends in no time! For more practical tips on making the most of your baking session, check out Food Network for inspiration.
Nutritional Facts for Starbucks Cake Pops
When you’re enjoying a delicious treat like cake pops, it helps to know what you’re munching on. Let’s take a closer look at the nutritional benefits of this popular snack inspired by the Starbucks cake pop recipe.
Calories
Each cake pop typically contains around 150 calories. This makes it a delightful indulgence without overwhelming your daily calorie intake.
Sugar Content
These sweet treats are known for their sugary goodness, with each cake pop packing about 15 grams of sugar. While they’re a fun treat, it’s good to be mindful of sugar consumption, especially if you’re watching your intake.
Suggested Serving Size
A reasonable serving size is one cake pop. However, if you can resist, they’re often perfect for sharing! Pairing it with your favorite drink can make for a satisfying snack break.
To learn more about balanced snacking and portion control, check out resources from the USDA or Harvard’s Nutrition Source.
Keep these nutritional facts in mind while indulging in your homemade Starbucks cake pops. Enjoy every bite, and remember, all treats are best savored in moderation!
FAQs about Starbucks Cake Pops
Can I use a different cake mix?
Absolutely! One of the best parts about this Starbucks cake pop recipe is its flexibility. You can swap in any flavor of cake mix that you love or even experiment with gluten-free options. Imagine chocolate cake pops made with red velvet mix or vanilla cake pops with a hint of lemon. Just keep in mind that the frosting or coating you pair with it should complement the cake flavor. Feel free to get creative!
How do I store leftover cake pops?
Storing leftover cake pops is a breeze. Place them in an airtight container in the refrigerator. They can last about a week this way, but after the second day, you’ll want to consider letting them come to room temperature before serving for the best flavor. If you’re looking for an even longer storage solution, you can freeze them! Just make sure to wrap them individually in plastic wrap or foil before placing them in a freezer bag. They’ll keep well for up to three months.
Can I make them ahead of time?
Yes, you can! This Starbucks cake pop recipe is perfect for making ahead of events or gatherings. You can prepare the cake, form the pops, and dip them in chocolate up to two days in advance. Just store them in the fridge in an airtight container until you’re ready to serve. You also have the option to freeze them after you make them and decorate them later—making party prep seamless and stress-free.
For more tips on cake storage and recipe variations, check out resources like The Kitchn and Serious Eats for expert insights!
Conclusion on Starbucks Cake Pops
Making the Starbucks cake pop recipe brings joy—not just from indulging in these delightful treats but also from the creative process of crafting them at home. With a few simple ingredients and steps, you can replicate that café experience right in your kitchen.
These cake pops are not only visually appealing but also customizable; you can experiment with flavors, colors, and decorations to suit any occasion. Plus, they’re perfect for gatherings, parties, or even just a cozy night in. When you take a bite, you’ll understand why these little bites of happiness deserve a spot in your dessert rotation. So, gather your ingredients and get ready for a sweet adventure!
For more insights, check out sources like Bon Appétit and The Kitchn for inspiration and tips on creative baking techniques!
PrintStarbucks Cake Pop Recipe: Easy Copycat for Sweet Moments

This easy copycat Starbucks cake pop recipe is perfect for sweet moments, providing a delightful treat that mimics the beloved cafe version.
- Prep Time: 30 minutes
- Cook Time: 25 minutes
- Total Time: 55 minutes
- Yield: 12 cake pops
- Category: Dessert
- Method: Baking
- Cuisine: American
- Diet: Vegetarian
Ingredients
- 1 cup cake mix
- 1/2 cup icing
- 1/4 cup melted chocolate
- 1 tablespoon coconut oil
- 1/2 teaspoon vanilla extract
- sprinkles for decoration
Instructions
- Prepare the cake mix as directed on the package and let it cool.
- Once cooled, crumble the cake into a medium bowl.
- Add icing and mix until fully combined.
- Form the mixture into small balls and place on a baking sheet.
- Melt the chocolate and coconut oil together until smooth.
- Dip the end of a lollipop stick into the melted chocolate and insert it into each cake ball.
- Coat each cake pop in the chocolate mixture and allow excess to drip off.
- Decorate with sprinkles before the chocolate hardens.
- Let the cake pops cool completely in the refrigerator.
Notes
- For a richer flavor, consider adding a bit of almond extract along with the vanilla.
- Experiment with different cake flavors and icings for variety.
Nutrition
- Serving Size: 1 cake pop
- Calories: 150
- Sugar: 10g
- Sodium: 50mg
- Fat: 7g
- Saturated Fat: 4g
- Unsaturated Fat: 2g
- Trans Fat: 0g
- Carbohydrates: 20g
- Fiber: 1g
- Protein: 2g
- Cholesterol: 20mg