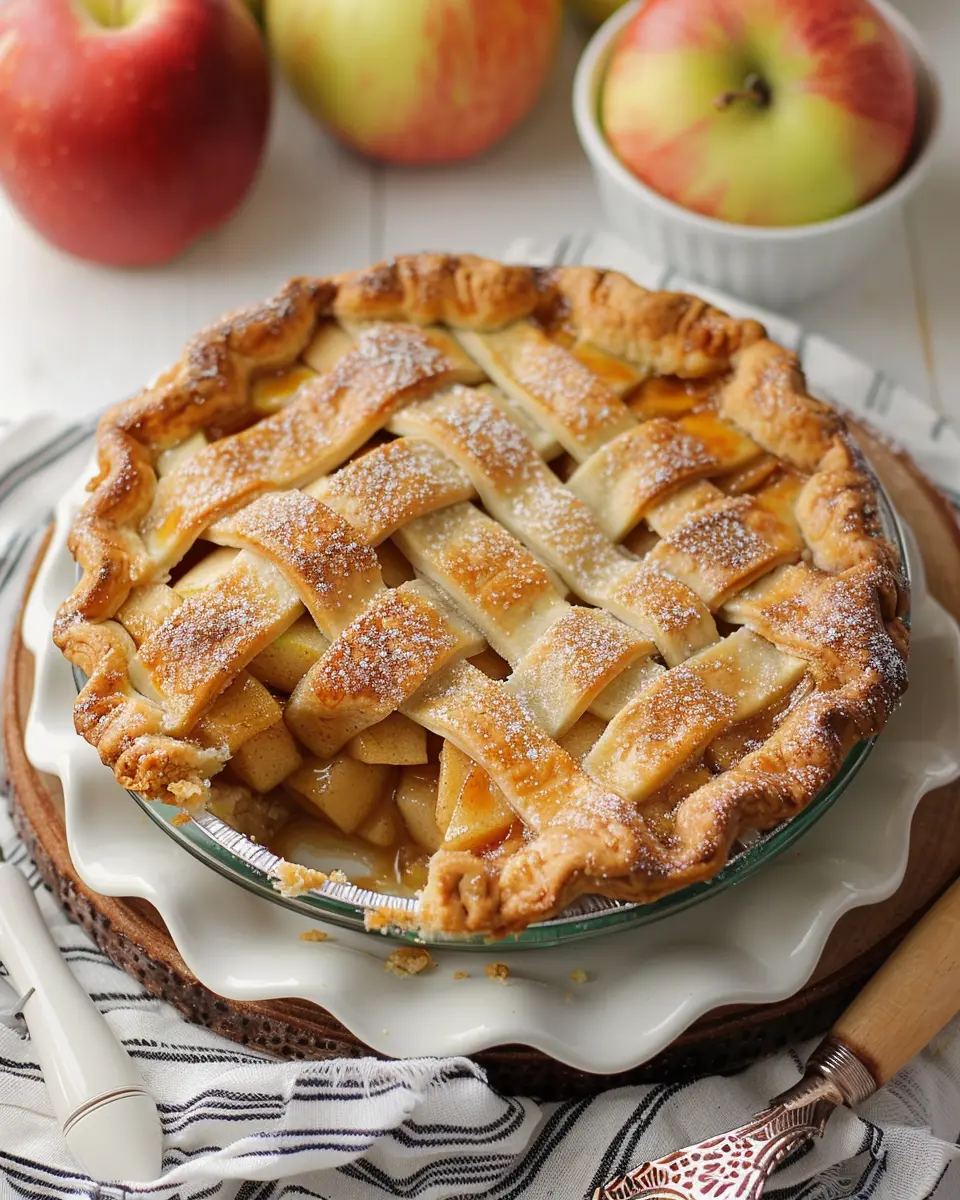
Introduction to Homemade Apple Pie
Why Homemade Apple Pie is the Best Choice for Young Professionals
As a young professional, you might find yourself juggling work commitments and social life, often at the expense of enjoying home-cooked meals. That’s where homemade apple pie comes in—it’s not just a dessert; it’s an experience. Crafting your own apple pie allows you to unwind, express creativity, and indulge in something that’s made with love. Plus, it impresses friends when you invite them over for a cozy gathering!
Many young professionals lean towards takeout or pre-packaged desserts, skipping out on the satisfaction of creating something from scratch. But let me tell you, there’s little that compares to the aroma of a freshly baked apple pie wafting through your kitchen. It’s a fantastic way to destress after a long day. It’s also an impressive addition to any potluck or gathering, letting friends and colleagues know that you put thought and effort into your culinary contributions.
A Brief History of Apple Pie
Did you know that apple pie dates back to the 14th century? Its origins can be traced to Europe, specifically England, where it was first made with unsweetened crusts and a mix of various fruits. The notion of the “American apple pie” truly took root in the early 19th century, symbolizing home and family, and ultimately becoming a beloved American tradition. A classic apple pie, with its flaky crust and spiced filling, embodies the idea that sometimes the simplest recipes create the most lasting memories.
For a deeper dive into its evolution, you can explore resources like the Food Timeline, which details the fascinating history of this dish.
The Importance of Using Fresh Ingredients
When it comes to making the perfect apple pie, quality matters. Using fresh, seasonal apples enhances the flavor dramatically—think sweet, crisp varieties like Honeycrisp or Granny Smith. The difference is like night and day! Not only do fresh ingredients elevate your dish, but they also make the baking process more satisfying.
Consider these benefits of using fresh ingredients:
- Flavor: Fresh apples taste better and provide a natural sweetness.
- Nutrition: Seasonal produce is often more nutritious and flavorful.
- Local Economy: Sourcing from local farmers supports your community.
Investing in quality ingredients helps you create a dessert that mirrors the love and effort you put into it. So, the next time you’re at the grocery store or a local farmers market, prioritize those fresh apples and the experience of whipping up your very own homemade apple pie!
Ingredients for Apple Pie
Creating a scrumptious apple pie starts with the right ingredients. Let’s dive into what you’ll need to make your dessert dreams come true.
Essential ingredients for the perfect pie crust
A great pie crust forms the backbone of your apple pie. For a flaky texture, you’ll need:
- All-purpose flour – about 2 ½ cups
- Unsalted butter – 1 cup, chilled and diced
- Salt – 1 teaspoon
- Ice water – 6 to 8 tablespoons
The key here is to keep everything cold to achieve that coveted flakiness!
The best apple varieties for a delicious pie
When it comes to apples, not all varieties are created equal. Opt for a mix of sweet and tart apples for a complex flavor. Popular choices include:
- Granny Smith – for tartness
- Honeycrisp – for sweetness and crunch
- Fuji or Braeburn – add depth to your filling
Using a variety helps balance the flavors and maintain the perfect texture in your pie.
Sweeteners and spices to elevate your flavor profile
To make your apple pie irresistible, consider adding:
- Granulated sugar – about ¾ cup, to sweeten
- Brown sugar – for a caramel-like richness
- Cinnamon and nutmeg – essential spices that bring warmth
A sprinkle of lemon juice can also brighten the flavors, making every bite simply divine!
For more in-depth insights on the science of baking, check out Serious Eats. Happy baking!
Preparing Apple Pie
Making a classic apple pie is a delightful experience that combines the joys of baking with the comforting aroma of cinnamon and baked apples wafting through your home. Here’s a friendly guide to perfecting your apple pie from start to finish.
Gather and Prepare Your Ingredients
Start your apple pie adventure by gathering all your ingredients. Here’s what you’ll need:
- 2 to 3 pounds of apples (a mix of Granny Smith and Honeycrisp works beautifully)
- 1 cup of granulated sugar
- 1 tablespoon of lemon juice
- 2 tablespoons of cornstarch or all-purpose flour
- 1 teaspoon of cinnamon
- ¼ teaspoon of nutmeg
- A pinch of salt
- 1 tablespoon of unsalted butter, cut into small pieces
- For the crust: 2 ½ cups of all-purpose flour, 1 teaspoon of salt, and 1 cup of unsalted butter, chilled, along with cold water to bind everything.
Try to choose fresh apples from local markets for the best flavor, and if you’re curious about which varieties are best, check out this article from The Kitchn.
Make the Perfect Pie Crust
A great apple pie starts with a flaky, buttery crust. Here’s how to make it:
- Combine the Dry Ingredients: In a large bowl, mix the flour and salt together.
- Cut in the Butter: Add the chilled butter, using a pastry cutter or your fingers to work them into the flour until it resembles coarse crumbs.
- Add Cold Water: Gradually mix in cold water, one tablespoon at a time, until the dough comes together. Be careful not to overwork it.
- Chill the Dough: Divide the dough into two discs, wrap them in plastic wrap, and chill them in the fridge for at least 30 minutes.
You can make the crust a day ahead. Just remember to let it sit at room temperature for a few minutes before rolling it out; chilled dough can be stubborn!
Cook the Apple Filling to Perfection
Now it’s time for the star of the show—your apple filling. Here’s how to do it:
- Peel, Core, and Slice the Apples: Aim for even slices for uniform cooking.
- Combine Ingredients: In a large mixing bowl, toss the sliced apples with sugar, lemon juice, cornstarch (or flour), cinnamon, nutmeg, and salt.
- Cook on the Stove: For extra flavor, cook the mixture over medium heat for a few minutes until it starts to soften. This also helps to release some of the juices.
This step is essential, as it prevents a soggy bottom crust and enhances the filling’s flavor. Expert opinions suggest that pre-cooking can drastically improve your pie’s overall texture.
Assemble Your Pie
With the crust and filling ready, it’s time to assemble:
- Roll Out the Crust: On a floured surface, roll out one disc of dough to fit your pie pan.
- Layer the Filling: Pour your apple mixture into the crust, spreading it evenly. Dot with butter.
- Top with Crust: Roll out the second disc and place it over the filling. Seal the edges by crimping with your fingers or a fork, and make a few slits on top to allow steam to escape.
Feeling creative? You can even cut shapes into the crust for a charming touch!
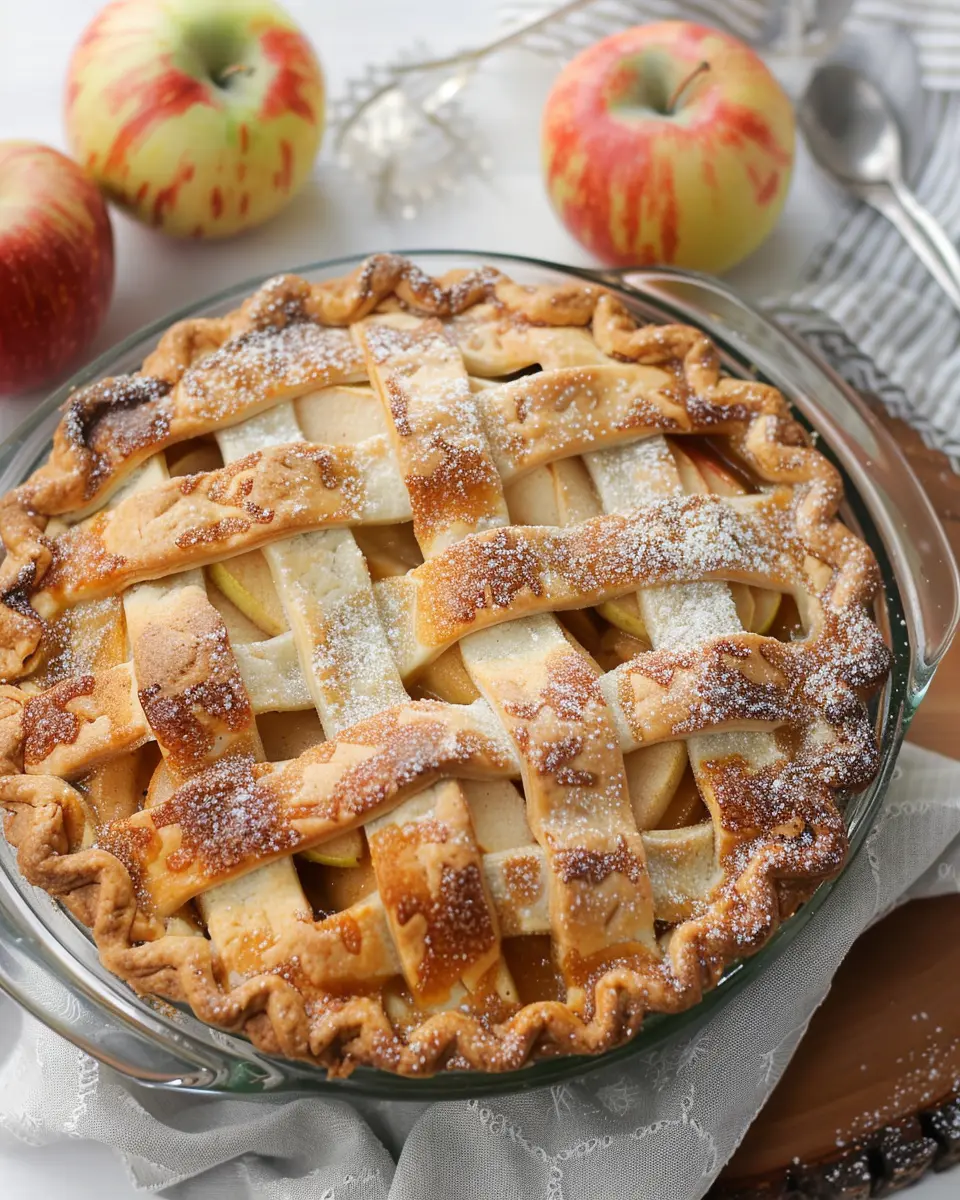
Baking to Golden-Brown Perfection
Finally, it’s time to bake your apple pie:
- Preheat the Oven: Set your oven to 425°F (220°C).
- Bake the Pie: Place the assembled pie on a baking sheet to catch any drips, and bake for about 15 minutes. Then, reduce the heat to 350°F (175°C) and bake for an additional 30 to 40 minutes, until the crust is golden brown and the filling is bubbling.
For a beautiful shine, you can brush the crust with an egg wash before baking.
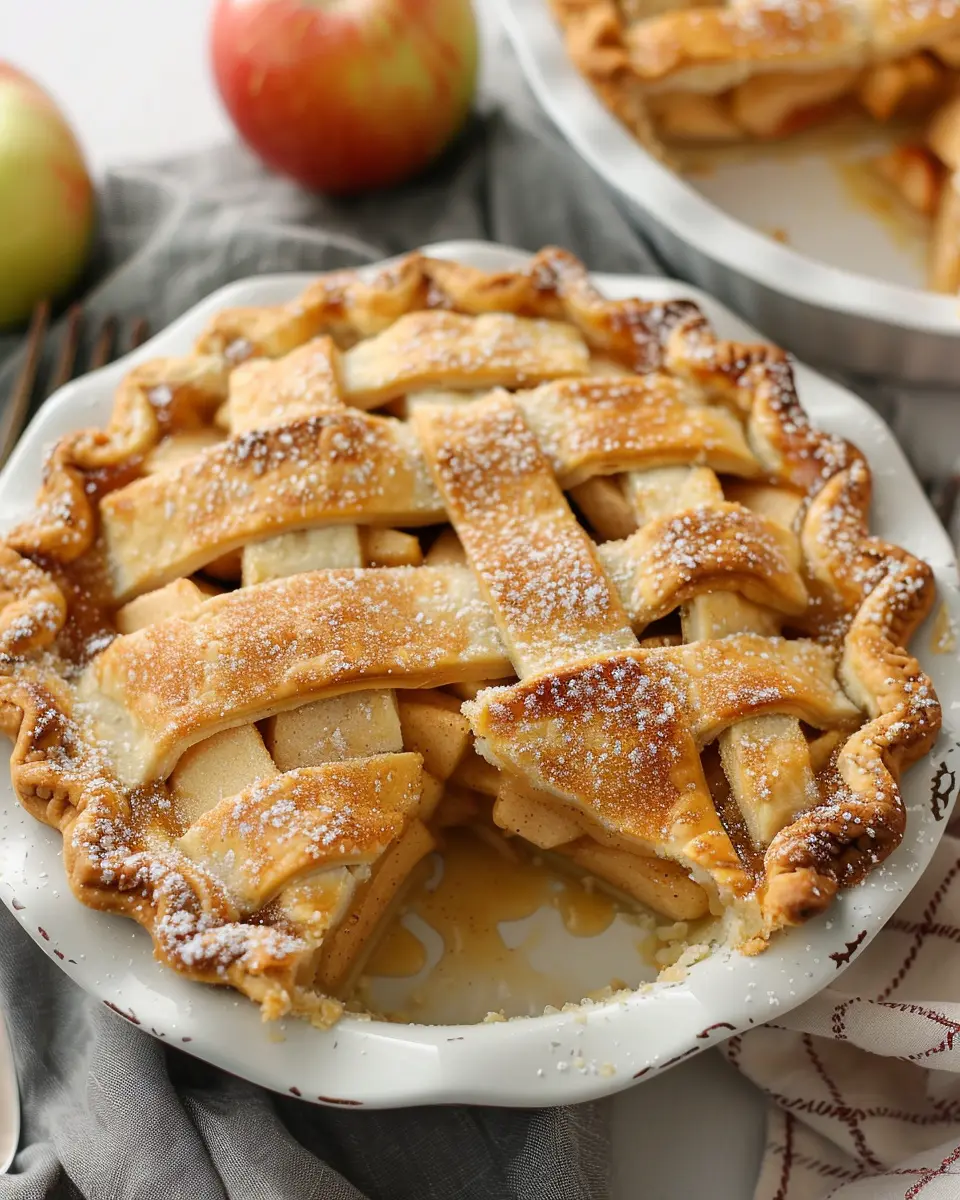
Your apple pie is now ready to enjoy! Whether served warm with a scoop of vanilla ice cream or at room temperature, this homemade dessert is sure to impress. Happy baking!

Variations on Apple Pie
Classic apple pie with a twist
If you adore apple pie but crave something a little different, try incorporating spices like cardamom or nutmeg for added warmth. Another delightful option is to swap out a portion of the apples with pears, creating a lovely flavor balance that’s sure to impress. You can even add a splash of lemon juice to brighten the sweetness, or consider a dash of maple syrup for an unexpected yet delicious depth.
Dutch apple pie with crumb topping
For a crunchy contrast to the traditional apple pie, the Dutch apple pie is perfect. This variation features a delightful crumb topping made from flour, sugar, and butter that adds texture. To make it more exciting, consider adding oats or chopped nuts to the crumb mixture. Not only does this enhance the flavor, but it also ups the health factor! You might choose to drizzle some caramel sauce over it before serving, making it an irresistible treat.
Vegan and gluten-free options for everyone
Inclusivity in dessert baking is a beautiful thing! You can easily create a vegan apple pie by using coconut oil or a dairy-free butter substitute, and replacing eggs with applesauce or flaxseed meal. For gluten-free enthusiasts, simply swap regular flour for a gluten-free blend, and you’re good to go! Many people find that brown rice flour or almond flour offers a fantastic texture and flavor.
For more tips on gluten-free baking, check out resources from the Gluten Intolerance Group and explore vegan-friendly sites such as Oh She Glows for inspiration.
Each variation shines bright and shows that no matter your dietary preferences, there’s always a delightful version of apple pie waiting for you!
Cooking Tips for Apple Pie
Secrets to a flaky crust
A flaky crust is the foundation of any great apple pie. The key is to keep your ingredients cold. Use chilled butter and ice water, and handle the dough minimally. This helps create those delightful layers that will flake beautifully when baked. If you want a little extra help, consider using half all-purpose flour and half pastry flour for added tenderness.
Tips for choosing the right apples
Not all apples are created equal for your pie! Look for a mix of sweet and tart varieties for the best flavor. Popular options include Granny Smith for tartness and Honeycrisp for sweetness. This balance creates a complexity in taste that will elevate your pie. According to experts at the Washington Apple Commission, using at least two types of apples will give you a flavorful punch!
How to avoid a soggy bottom crust
A soggy bottom crust is every baker’s nightmare. To prevent this, try blind baking your crust for about 10 minutes before filling it with apples. This sets the crust and creates a barrier. You can also sprinkle some flour or cornstarch on the bottom, which will absorb excess moisture from the apples as they bake.
Serving Suggestions for Apple Pie
Best ways to serve your apple pie
There’s nothing quite like a warm slice of apple pie right out of the oven. For the ultimate experience, serve it slightly warmed, allowing the buttery crust to shine alongside that sweet, cinnamon-spiced apple filling. Consider garnishing each slice with a dollop of freshly whipped cream or a scoop of vanilla ice cream — the combination is a match made in dessert heaven. If you’re feeling extra indulgent, try drizzling a bit of caramel sauce over the top.
Pairing apple pie with the right sides
When it comes to sides, simplicity is key. A side of vanilla bean gelato or even a light salad can balance the richness of your apple pie. If you’re hosting a gathering, why not add an autumn twist with roasted sweet potatoes seasoned lightly? This creates a comforting contrast that’s perfect for fall gatherings. Check out ideas on seasonal sides at Epicurious.
Creative topping ideas to impress guests
Want to get a bit fancy with your apple pie presentation? Think outside the box! Experiment with toppings like a sprinkle of candied pecans for a delightful crunch or a dash of apple cider glaze for an extra layer of flavor. For a fun twist, try using turkey bacon crumbles on top for a savory element, which creates a unique sweet-and-salty profile. Your guests will definitely be impressed!
Time Breakdown for Apple Pie
Preparation time
Making an apple pie is a delightful process that starts with about 20-30 minutes of preparation. During this time, you’ll chop your apples and mix the perfect blend of spices, sugar, and lemon juice to bring out their natural flavor. You’ll also prepare your crust, whether homemade or store-bought.
Cooking time
Once your pie is assembled, it will need about 45-50 minutes in the oven. This allows the apples to soften beautifully while the crust turns golden and flaky. Make sure you keep an eye on it to prevent over-browning!
Total time
In total, you’re looking at approximately 1 hour and 10-80 minutes from start to finish for this apple pie.
Now, who wouldn’t want a slice of that? If you’re eager for tips on perfecting your crust or selecting the ideal apple varieties, check out this guide for more insights!
Nutritional Facts for Apple Pie
Calories per slice
A typical slice of apple pie contains around 250-300 calories, depending on the recipe and serving size. This makes it a delightful treat, but it’s essential to enjoy it in moderation, especially if you’re watching your calorie intake.
Key nutritional components
When it comes to nutrition, apple pie offers more than just sweet indulgence. Key components include:
- Carbohydrates: Mainly from the crust and apples, providing energy.
- Fiber: Apples are a good source of dietary fiber, which aids digestion.
- Vitamins: Apples contain Vitamin C and various antioxidants, adding some nutritional value to your dessert.
For more on the nutritional benefits of apples, consider checking out authoritative sources like the USDA’s food database.
Tips for healthier versions of apple pie
If you’re looking to lighten up your apple pie, here are a few simple tips:
- Use whole-grain crusts: This increases fiber and nutrients.
- Reduce sugar: Consider using natural sweeteners like honey or maple syrup.
- Add nuts: Toss in walnuts or almonds for extra healthy fats.
These tweaks can help you enjoy a delicious slice while maintaining a balanced diet. Got your own healthy apple pie variations? Share them in the comments!
FAQs about Apple Pie
What apples are best for baking?
Choosing the right apples can make or break your apple pie. A good rule of thumb is to opt for a mix of sweet and tart varieties. Some of my personal favorites include:
- Granny Smith: They’re tart and hold their shape well.
- Honeycrisp: Their sweetness and crunch adds a delightful contrast.
- Fuji: These apples are sweet and juicy, making them a great addition.
By combining these varieties, you’ll achieve a delicious balance in flavors and textures.
How can I make my filling less runny?
A runny apple pie filling can be frustrating, but there are ways to prevent it. Here are some handy tips:
- Use thickeners: Incorporate cornstarch or tapioca flour into your filling. About 2 tablespoons should do the trick!
- Pre-cook the apples: Lightly sautéing the apples with sugar can help remove excess moisture before baking.
- Drain excess liquid: If you’re using frozen apples, make sure to drain any released liquids.
These methods should ensure your apple pie filling comes out perfectly thick and delicious.
Can I make apple pie ahead of time?
Absolutely! You can either prepare your apple pie and freeze it unbaked or bake it ahead of time and store it.
- Unbaked option: Wrap your assembled pie tightly in plastic wrap and freeze for up to three months. Just remember to add extra time to your baking when you pull it out of the freezer.
- Baked option: Let it cool completely, then cover it and store in the fridge for up to five days.
Planning ahead is a great way to free up your time during busy weeks, making your delightful apple pie ready whenever you need it!
For more tips, check out BBC Good Food or Serious Eats for even more advice on perfecting your apple pie.
Conclusion on Homemade Apple Pie
Recap of the Joys of Baking Your Own Pie
Baking your own apple pie is truly a delight! You get to control each ingredient, ensuring only the freshest apples and rich spices are included. The aroma that fills your kitchen is unparalleled, creating a warm and inviting atmosphere every time.
Encouragement to Try New Variations
Don’t hesitate to experiment with your apple pie! Whether it’s adding a touch of caramel or mixing in different fruits like cranberries or pears, the possibilities are endless. Get inspired by checking out flavor combinations from experts at sites like The Kitchn.
Final Thoughts on the Satisfaction of Homemade Desserts
There’s something uniquely gratifying about serving a dessert you’ve made from scratch. The joy on your friends’ and family’s faces as they savor each slice of your apple pie makes every moment in the kitchen worthwhile. Plus, wouldn’t it be fun to host a pie-off competition with your friends? Give it a try; you’ll love the camaraderie and creativity it brings!
PrintApple Pie Bliss: The Best Homemade Recipe for Comfort Food

Experience the delightful taste of homemade apple pie with this comforting recipe that brings warmth to every bite.
- Prep Time: 20 minutes
- Cook Time: 50 minutes
- Total Time: 1 hour 10 minutes
- Yield: 8 servings
- Category: Desserts
- Method: Baking
- Cuisine: American
- Diet: Vegetarian
Ingredients
- 6 apples, peeled and sliced
- 1 cup sugar
- 1 tablespoon cinnamon
- 1/4 teaspoon nutmeg
- 1 tablespoon lemon juice
- 2 tablespoons butter
- 1 package pie crusts
Instructions
- Preheat your oven to 425°F (220°C).
- In a large bowl, combine the apples, sugar, cinnamon, nutmeg, and lemon juice.
- Pour the apple mixture into a pie crust and dot with butter.
- Cover with the second pie crust, seal, and cut slits for steam.
- Bake in the preheated oven for 15 minutes.
- Reduce the temperature to 350°F (175°C) and continue baking for 30-35 minutes, or until the apples are soft and the crust is golden.
Notes
- For extra flavor, consider adding a pinch of vanilla extract.
- Let the pie cool before serving to allow the filling to set.
Nutrition
- Serving Size: 1 slice
- Calories: 320
- Sugar: 15g
- Sodium: 150mg
- Fat: 14g
- Saturated Fat: 7g
- Unsaturated Fat: 5g
- Trans Fat: 0g
- Carbohydrates: 45g
- Fiber: 3g
- Protein: 2g
- Cholesterol: 20mg